Showing posts with label mint. Show all posts

Tuesday, July 31, 2012

Mint Madness

I’m obsessed with the color mint green. Like it. Love it. Gotta have it. (Cold Stone Creamery reference, anyone?) So, I have a whole can of mint green paint left from my DIY vintage nightstand, and I’ve been painting everything in sight. I thought I’d share a few of my most recent projects.
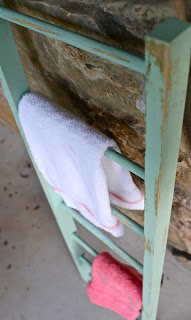
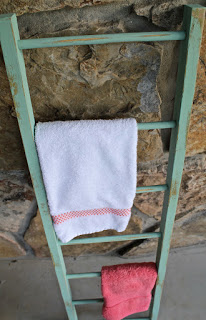
First off, I recently found this small wooden ladder from a garage sale for $2! ( If you wanted to imitate this DIY, I did a little searching and found a similar ladder on Ebay for $11.24.)
 I painted the ladder with my lovely mint paint and distressed it with sandpaper. My paint is Walmart interior flat Norwegian Vintage Green. I plan to lean this against the wall in my bathroom and hang washcloths & hand towels on it.

Secondly, I distressed an old wooden frame and added some mint accents. I simply sanded the edges and crevices of the frame, dusted it off, and painted accents of mint (I used the same paint used above but acrylic paint would work for this too). To achieve the distressed look, make sure there is NOT much paint on your paintbrush. I used a paper towel to dab up excess paint or rub areas where paint went on too thick!
Lastly, I painted a cheap vase from the Dollar Store using a method I saw on pinterest. All you do is drip some paint inside your vase, and tilt your vase around to cover the inside. To fill in all the holes, just set your vase upside down and leave it to drip and dry. I touched up a few places on the top of mine after it had dried. I imagine acrylic paint would work just as well or better than the paint I used. I love the subtle mint with some bright flowers.
And that sums up my dose of mint for the day! 

-A

Friday, June 22, 2012

DIY Vintage Nightstand


This DIY project was partially a gift, but I ended up getting to help out with the end process. A certain someone took note of my 7524805714 pins of distressed mint green furniture and took action… :)

DIY Vintage Distressed Nightstand


All this project calls for is an old piece of furniture (in my case a nightstand), sandpaper, an old candle (or candle wax), primer, and paint!

1. Find your old nightstand. (Try Goodwill or a garage sale!)
2. Clean it with a wet rag and dry it.
3. Detach all handles.
4. Sand down the entire piece of furniture using medium grit sand paper followed by fine grit sandpaper (if you’re lucky enough to have an electric sander, this step would be much quicker). Also, you can create notches, rough patches, etc. with a knife if you want.
5. Wipe away all excess dust with wet rag and dry.
6. Using an old candle- or piece of candle- wax all the edges of your furniture and any other places you want the wood to show through.
7. Now, paint your entire piece of furniture with interior latex primer. Allow the primer to dry (most primer dries relatively fast).
8. Once the primer is dry, paint the piece with the color of your choice (my paint is just Walmart interior flat paint, color- Norwegian Vintage Green). Since you’re going for a distressed look, only one layer of paint is necessary. Let the paint dry.
9. Using fine grit sandpaper, scrape off the paint where you previously rubbed the wax (you can scrape off as little or as much as you’d like, depending on how distressed you want your piece). For this part, make sure you sand lightly. You can also use the back edge of a butter knife to distress smaller areas that are difficult to do with sandpaper.
10. Don’t forget to reattach your handles! (if your original handles are not-so-cute try Hobby Lobby for some cuter ones!)

And there you are. Your own custom-made vintage nightstand- of course much cheaper than any you’d see at an antique store :)


-A